 Skip to content

Since the launch of Amazon Elastic Container Service for Kubernetes (Amazon EKS) at AWS re:Invent in 2017, AWS has continued to deliver innovative capabilities for this service. In particular, innovations that enable a variety of deployment patterns have made Amazon EKS the go-to Kubernetes service for application deployment and scalability. For example, in December 2019, AWS announced that serverless Kubernetes Pods can be run using Amazon EKS and AWS Fargate. (To learn how to set up serverless deployment of Pods, read the blog,” How to set up serverless Kubernetes Pods using AWS Fargate and Amazon EKS.”)
In this blog, I’ll provide a tutorial on how to set up Kubernetes deployment by implementing a single Amazon EKS Control Plane. Then, I’ll highlight how the nOps cloud management platform can help you optimize Amazon EC2 costs once you have a single Amazon EKS Control Plane in place. (For an overall tutorial on optimizing Kubernetes costs, read my prior blog, “How to Optimize the Cost of Your Kubernetes Deployment.”)
What is a Kubernetes Control Plane?
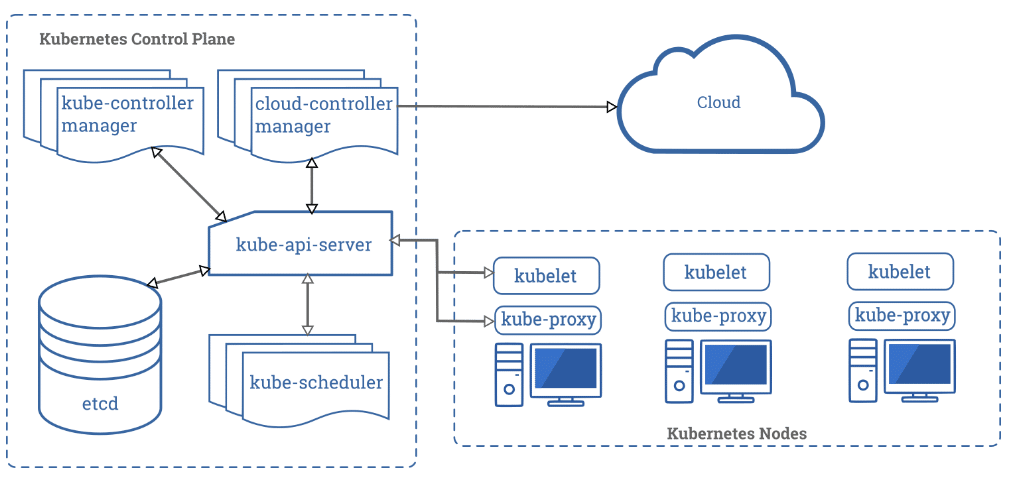
Above is a diagram showing the components of a Kubernetes cluster. Each Kubernetes cluster includes a Control Plane (to manage the worker nodes and the Pods in the cluster) including:
- A Kubernetes master node that runs the kube-apiserver, kube-controller-manager, and kube-scheduler processes.
- Worker node(s) that run the workloads. Each worker node connects to a Pod’s kubelet and kube-proxy processes.
How Kubernetes deployment can complicate environments
One of the fundamental principles of DevOps is having a delivery pipeline comprised of three environments:
- Development (dev) – Developers build and test changes made to an app by integrating and merging branches into a trunk. The app is then promoted to the next environment.
- Staging or test – The resilience of the app is tested to determine whether it meets business requirements. Once this stage is completed, the app moves to the next environment.
- Production (prod) – The app is available for customers to use.
Having a clear separation between the dev, staging, and prod environments enable Kubernetes to provide containers with high-availability, self-healing capabilities, and appropriate allocation of resources.
However, separating the environments with a fresh Amazon EKS cluster – including a separate Amazon EKS Control Plane in each of them – can cause complications. Each provisioned cluster will instantiate a default namespace to hold the default set of Pods, Services, and Deployments used by the cluster, resulting in the following issues:
- Resources that users create in one namespace are hidden from other namespaces. As a result:
- Users interacting with one namespace do not see the content in another namespace.
- A namespace is not aware of the nodes within a cluster.
- Nodes within a cluster are not aware of the namespace.
- Resources will fly around the worker nodes within the cluster. As a result, the kube-scheduler may schedule both the production and staging Pods on the same worker node. The danger behind this is that, when anything happens to this worker node, both the staging and prod Pods are affected.
- This approach is expensive.
- Capital Expense (CapEx): You pay an extra $72/month for each of the clusters in each of the environments. And, there are costs for Amazon Virtual Private Cloud (Amazon VPC), NAT Gateway, and other components required to run your Amazon EKS cluster.
- Operational Expense (OpEx): For each cluster, a fleet of Amazon EC2 instances will be set up. While there is an AWS Free Tier that includes 750 hours of Linux and Windows t2.micro instances each month for one year (if you use only Amazon EC2 Micro instances), beyond that Tier you will incur OpEx cost for Amazon EC2 instances based on the plan you select: On-Demand, Savings Plans, Reserved Instances, and Spot Instances, or Dedicated Hosts.
The smarter way to set up Kubernetes deployment
While there needs to be a clear separation between the dev, staging, and prod environments, the smarter way to deploy Kubernetes is to have a single Amazon EKS Control Plane instead of three Amazon EKS Control Planes. To do so, use Node Affinity, which is a Kubernetes feature that enables you to configure which specific node(s) your Pod is eligible to be scheduled on, based on certain rules and conditions. If those conditions aren’t met, the Pod remains in a pending state.
For our example, we will use node labels to determine on which node(s) the Pods will be scheduled. You can apply this to Amazon EKS Control Planes that are already running or a new Control Plane.
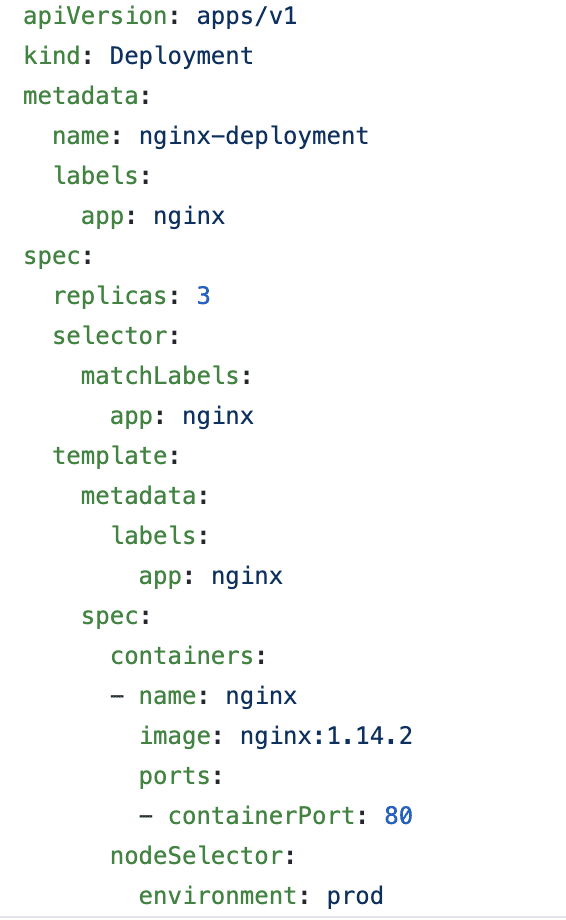
- Prepare the YAML file that ensures that the Pod is scheduled based on the node label specified. In this case, the node selector ensures the Pod is scheduled to the environment node with the label “prod.”
environment: prod
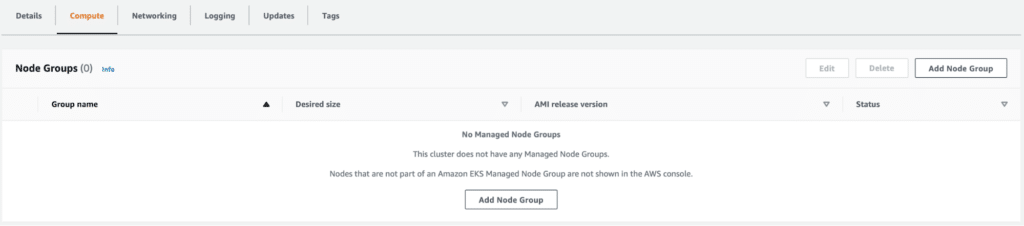
- Set up the nodes with these parameters. We can use the Amazon EKS managed node groups in the Amazon EKS console. Click on Add Node Group to begin to set up a managed node group.
- Fill out the name of the node group, select the AWS Identity and Access Management (AWS IAM) role for permissions, and select the subnet.Note: Choose a private subnet for security purposes.Then, select an SSH key pair (Amazon EC2 public and private keys are known as a key pair). If a key pair doesn’t exist, quickly dash over to the Amazon EC2 console to create an SSH key pair. Choose the file format in which to save the private key:
- To save the private key in a format that can be used with OpenSSH, choose .pem.
- To save the private key in a format that can be used with PuTTY, choose .ppk.
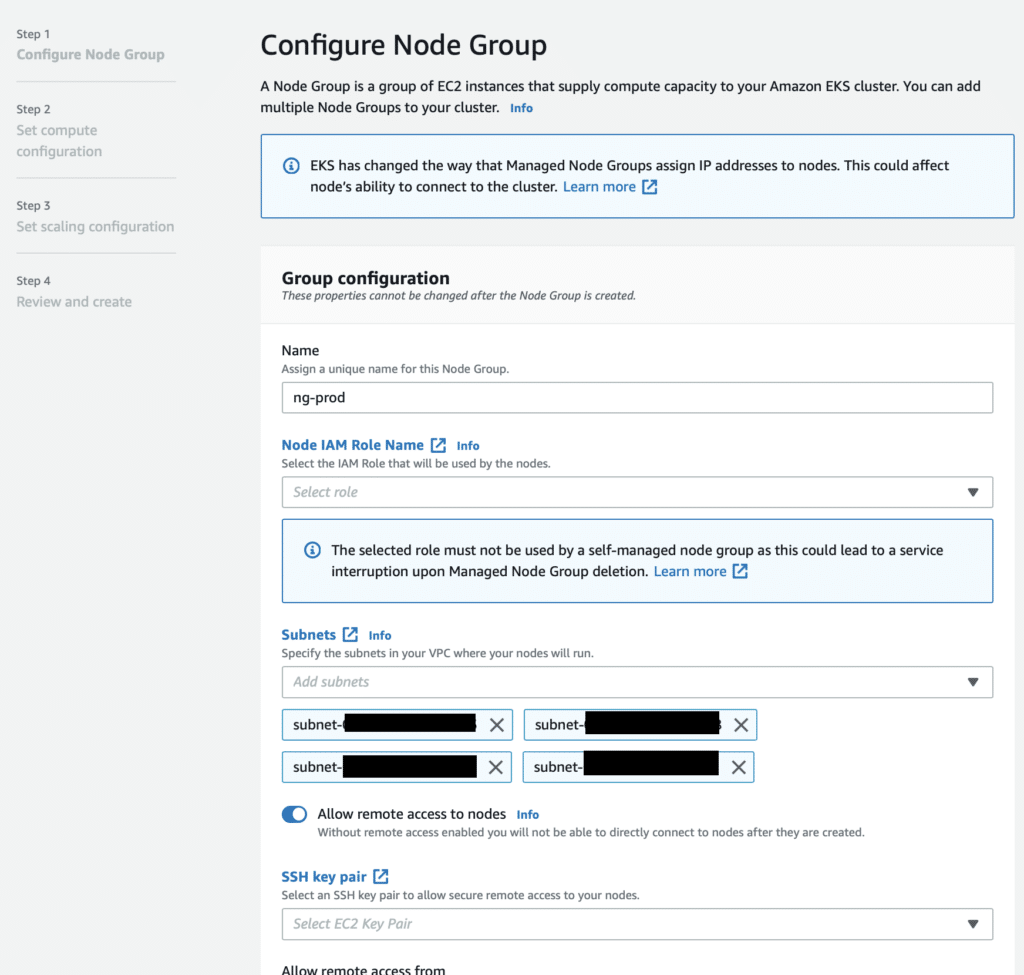
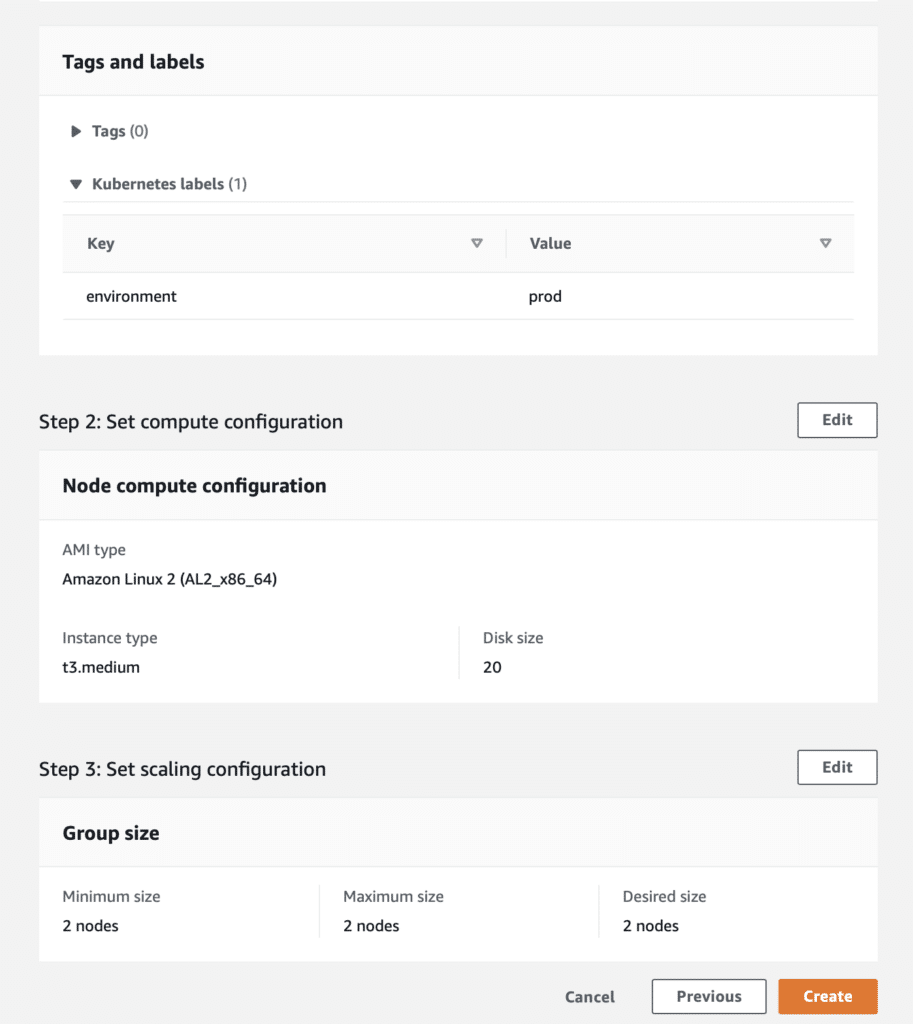
- On the Kubernetes labels pane, enter the key and the value. Then click Next. Note: The key and value must correspond to the key and value specified in the Kubernetes YAML file.

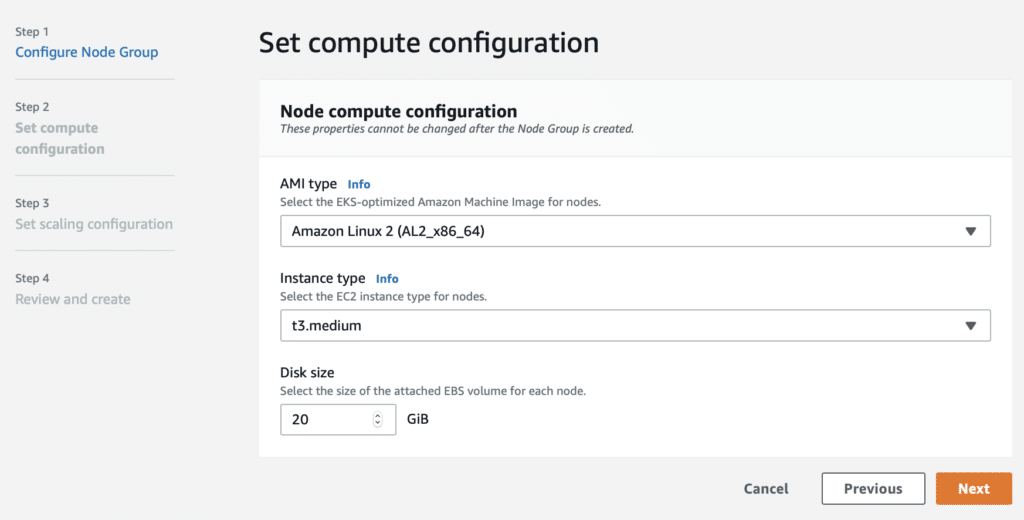
- Select the Amazon Machine Image (AMI) type, Amazon EC2 instance type, and disk size configuration for the node/Amazon EC2 instance. When that is confirmed, click Next.
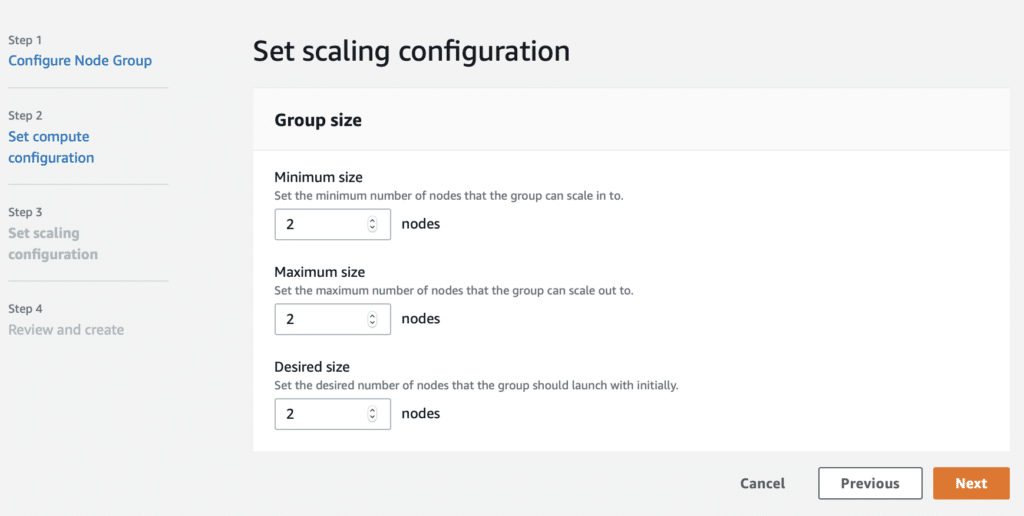
- Select the configuration of the AWS Auto Scaling group for the node group – Minimum, Maximum, and Desired size. When confirmed, click Next.
- Review the configuration and click Create to create a node group. This operation takes a little while and eventually creates Amazon EC2 instances and attaches them as worker nodes to the Amazon EKS cluster.
- The last step is to apply the YAML file to the cluster. Note: This is the YAML file we created at the beginning of the process, where we specified the node selector and labeled the node group to which the pods are to be deployed.
This configuration can be applied to configure the dev, staging, and prod environments with all instances running in a single Control Plane (instead of three separate Control Planes). All environments will be in the same Control Plane, well-separated on the node level and the cluster level.
Now that you’ve got a single Amazon EKS Control Plane, here’s how to optimize Amazon EC2 costs using the nOps cloud management platform.
nOps’ dashboard recommendations can help you optimize Amazon EC2 costs.
nOps breaks down the cost of each of the components driving CapEx in a clear format, as shown below. You can view the costs of each Amazon EKS cluster, Amazon Virtual Private Cloud (Amazon VPC) costs, NAT Gateway, and other components required to run your Amazon EKS cluster.
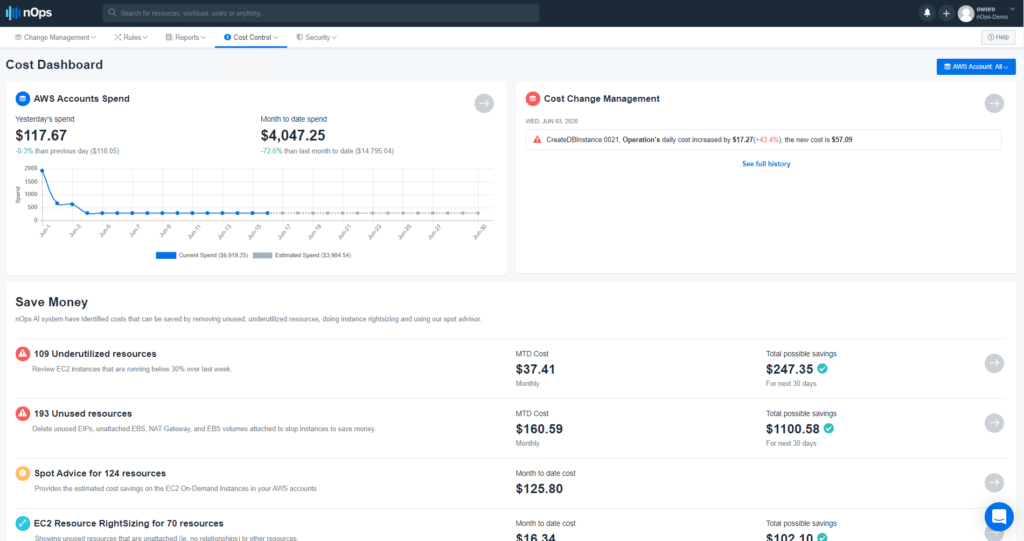
The nOps dashboard recommends better pricing for Amazon EC2 instances – e.g., Reserved Instances or Spot Instances – based on the usage pattern of all the Amazon EC2 instances on the cluster. To view these recommendations, log in to the nOps Cost Dashboard. On the top menu bar, click on Cost Control > RI Management for Reserved Instance recommendations. Or, you can click on Cost Control > Spot Advisor for Spot Instance recommendations.
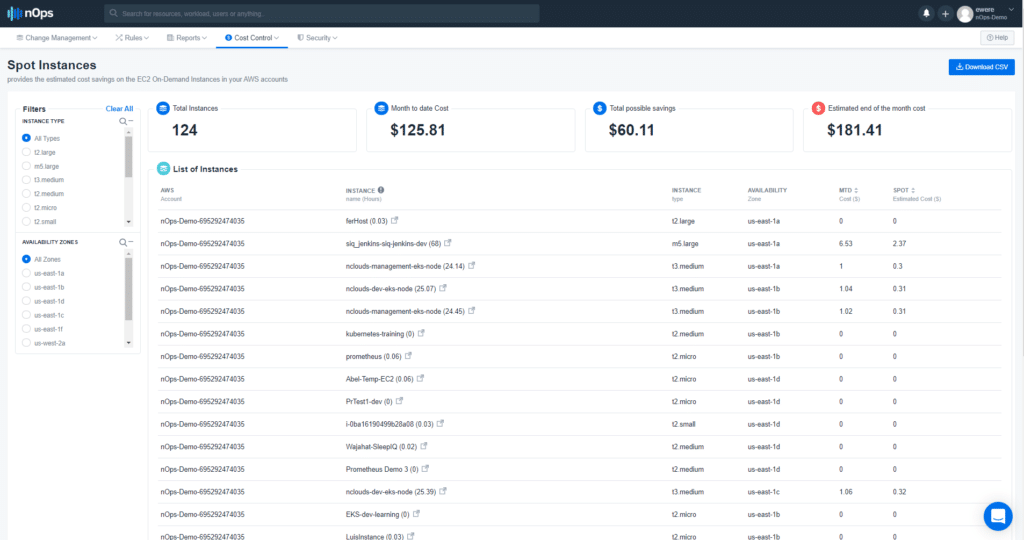
By implementing the Amazon EC2 instance recommendations on the dashboard, you can reduce the cost of running the worker nodes of the Kubernetes cluster, thereby dropping the overall cost of the Amazon EKS Control Plane.
In conclusion
Workloads can be deployed in a variety of ways in Amazon EKS. Instead of having three Amazon EKS Control Planes, the smarter way to set up Kubernetes deployment is to have a single Control Plane that separates Pods both within the cluster using namespaces, and outside the cluster.
The availability, cost, and performance of applications within the cluster are critical when architecting the deployment patterns of the workload in the cluster. By using the nOps dashboard, you can continually make the best choices in how to architect your workloads to save costs while ensuring the availability, scalability, and reliability of your systems.
Want to optimize your Amazon EC2 costs quickly and continuously? Click here to get started with a free trial of nOps (or click here to sign in to nOps if you’re already a user) and take advantage of its cost control capabilities.


