1. Access the RDS dashboard at https://console.aws.amazon.com/rds/.
2. Under the RDS Dashboard Resources section, click DB Instances.
3. Select the DB Identifier to inspect.
4. Click on Connectivity & security Tab and examine the following information:
a.Subnets: This information is available in the middle Networking sub-section.
An RDS instance could be provisioned in multiple subnets, as shown below
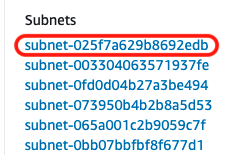
1. Click on the first subnet link as shown above to navigate to the VPC Subnets page.
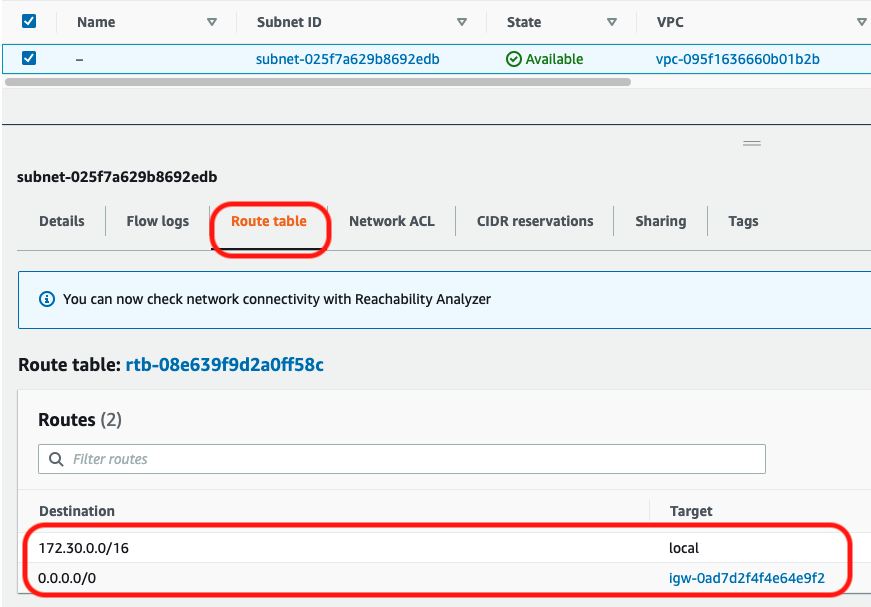
2. Select the linked subnet listed on the page and scroll down to view the Route Table tab.
If an Internet Gateway (igw-xxxxxxxxxxx) routes to CIDR block 0.0.0.0/0 as shown below, the RDS instance in question is deployed in a public subnet.
Skip to Part b as soon as you find a public subnet attached to the RDS instance.
3. Steps 1 and 2 should be repeated to ascertain the status of other VPC subnets connected with the specified RDS instance.
4. If there are no public subnets attached to your RDS instance, your instance is protected from direct internet traffic and can only be accessed within the desired VPC.
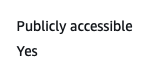
b.Public accessible: This information is available on the right side under the Security section.
If the value is set to :
1. Yes indicates that your RDS instance has a public IP address and that anyone outside the VPC may connect to it. If this is the case, proceed to Part C.
2.No signifies that EC2 instances and other devices outside of the VPC cannot connect to the instance. Instead, you specify access using a security group.
Proceed to **Part C** to determine which security group has been attached and which incoming rules have been defined.
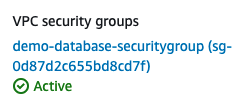
c.VPC Security Groups: This information may be found on the right side under the Security section. Note there might be several security groups associated with the instance.
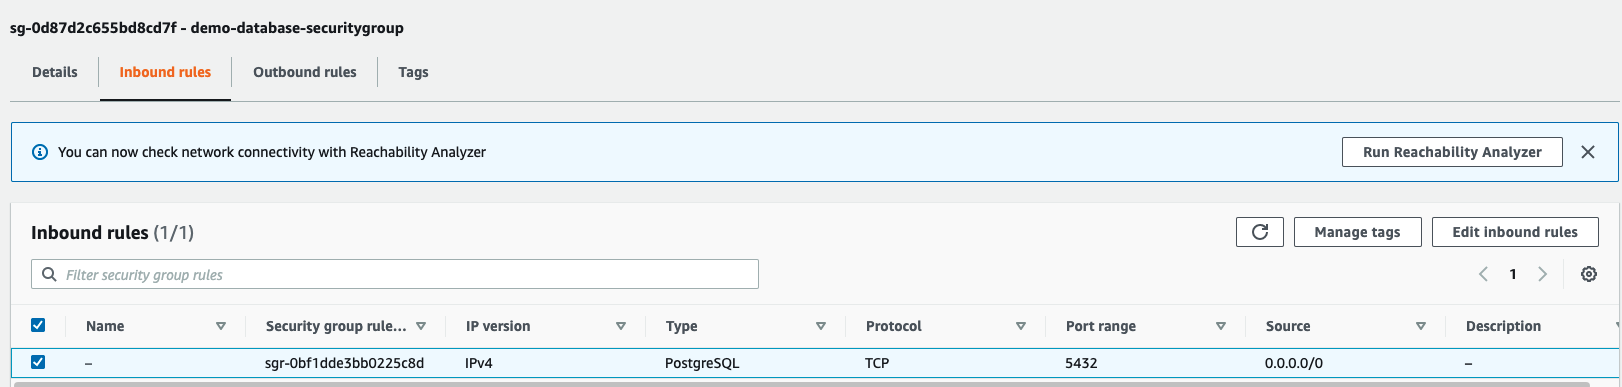
Clicking on any security group will redirect you to its configuration of inbound and outbound rules, as shown below.
But before doing that, let’s examine the port number which the Database is listening on as described below:
Port Number: This information is generally available on the left side under the Endpoint & port section. For example, in the screenshot below, the port number that exampledb is listening on is 5432.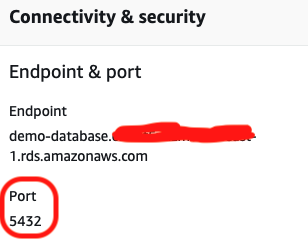
Now click on the first security group to redirect to the Security Group Configuration Page.
Select the Security group listed on the page and click on the
Inbound Rulestab. Note that if one or more rules have the source set to0.0.0.0/0** or**::/0as identified in the screenshot below, the security group in question allows unrestricted traffic on port5432.
5. Replicate steps 3–4 for other RDS database instances deployed in the current region.
6. Change the AWS region from the top menu and repeat the audit procedure.
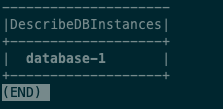
1. Run describe-db-instance command (OSX/Linux/UNIX) to list all RDS instance names, available in the selected AWS region:
aws rds describe-db-instances --region ap-south-1 --query 'DBInstances[?DBInstanceStatus==`available`].[DBInstanceIdentifier]' --output table The command should return each database instance identifier:
2. Run modify-db-instance command (OSX/Linux/UNIX) to modify the selected RDS instance configuration. The following command example enables Multi-AZ deployment for an RDS instance named database-1. The configuration change is asynchronously applied as soon as possible:
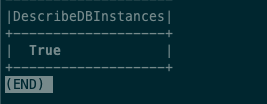
aws rds modify-db-instance --db-instance-identifier database-1 --multi-az --apply-immediately --output table 3. Run describe-db-instance command (OSX/Linux/UNIX) using the RDS instance identifier to check if the Multi-AZ feature has been successfully enabled:
aws rds describe-db-instances --region ap-south-1 --db-instance-identifier database-1 --query 'DBInstances[*].[MultiAZ]' --output table 4. The command output should show the current status:
Steps can be repeated for other AWS regions. Change the AWS region by using the –region filter to repeat the process for other regions.
 Skip to content