Skip to content

8 FinOps Best Practices for 2025
According to the 2024 State of FinOps report, reducing cloud waste and managing commitments are the most important considerations for tech organizations this year.
However, many organizations still hope to make more progress on their FinOps initiatives, with 61.8% still at the crawl phase (according to the Foundation’s Crawl, Walk, Run framework).
At nOps, we manage $1.5 billion in cloud spend — we have plenty of experience managing cloud costs. In this article, we share our top 8 FinOps best practices for bridging the gap between engineering and finance to better manage and optimize your cloud costs.
What is FinOps?
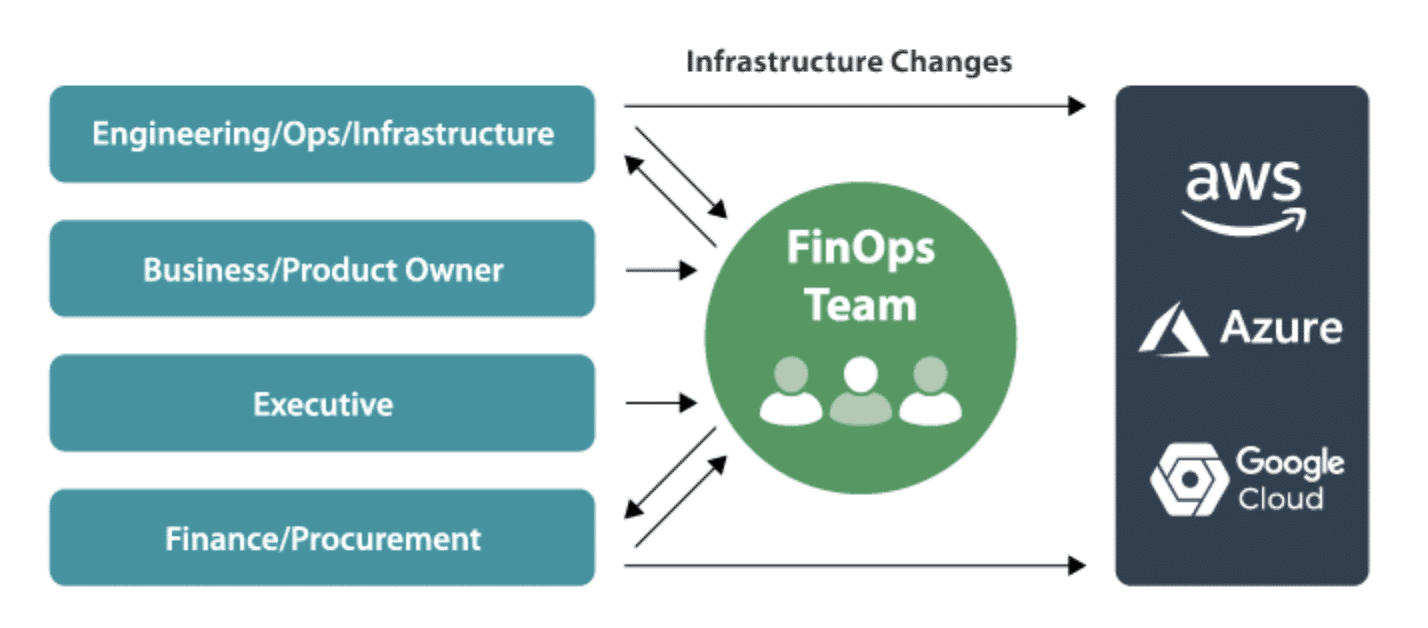
FinOps (a term which comes from combining Finance and DevOps) is the set of cloud financial management practices that allow teams to collaborate on managing their cloud costs. Engineering, Finance, Product and Business teams collaborate on FinOps initiatives to gain financial control and visibility, optimize cloud computing costs and resource ROI, and facilitate faster product delivery.
According to the FinOps foundation, other names for FinOps include “Cloud Financial Management”, “Cloud Financial Engineering” “Cloud Cost Management”, “Cloud Optimization”, and “Cloud Financial Optimization” (note that Cloud Financial Operations is typically not used today, as it is easily confused with traditional business Financial Operations).
FinOps Best Practices For Effective Cloud Financial Management
Step One: Cloud Cost Visibility
- What do the thousands of lines of my Cost and Usage Report (CUR) mean? How much did my product/service/application actually cost?
- Who is driving cloud costs? How do I allocate shared costs back to cost centers?
- Why did my AWS bill go up or down and what is it going to be next month?
- What caused these unexpected costs?
One key FinOps best practice is to gain consistent visibility into your cloud environment so you can fully allocate, monitor, analyze and report cloud costs on a granular basis. To make good business decisions, you need to fully understand how resources are being used and by whom. Let’s dive into a few tips for gaining visibility into your cloud resources.
Hourly granularity is key.
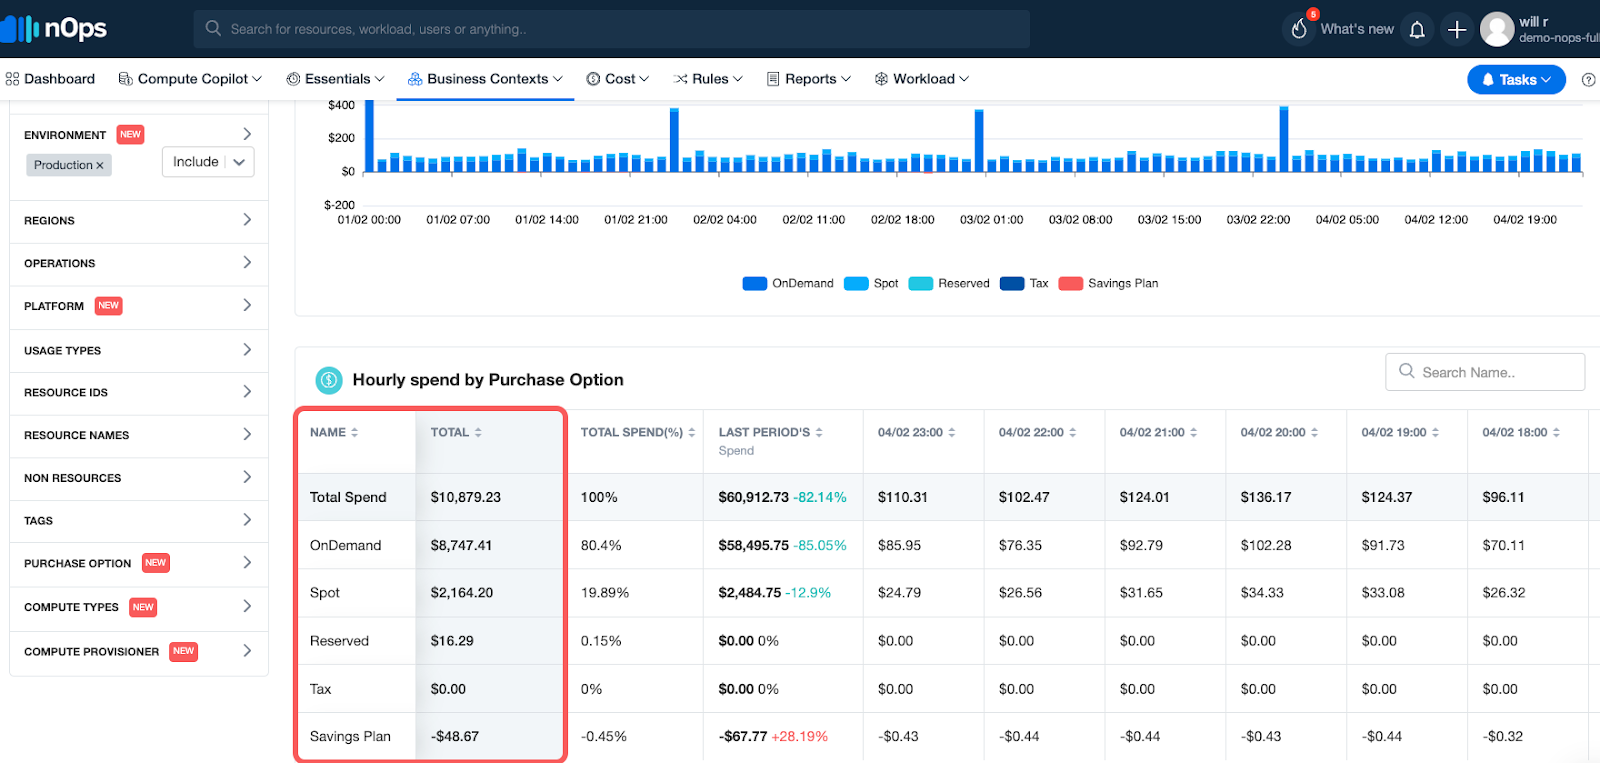
With hourly granularity, you’re able to see patterns and spikes in usage, allowing you to trace back the causes of unexpected costs. A cloud cost visibility platform can help you drill down into your hourly cloud spending by service, resource, and other essential criteria.
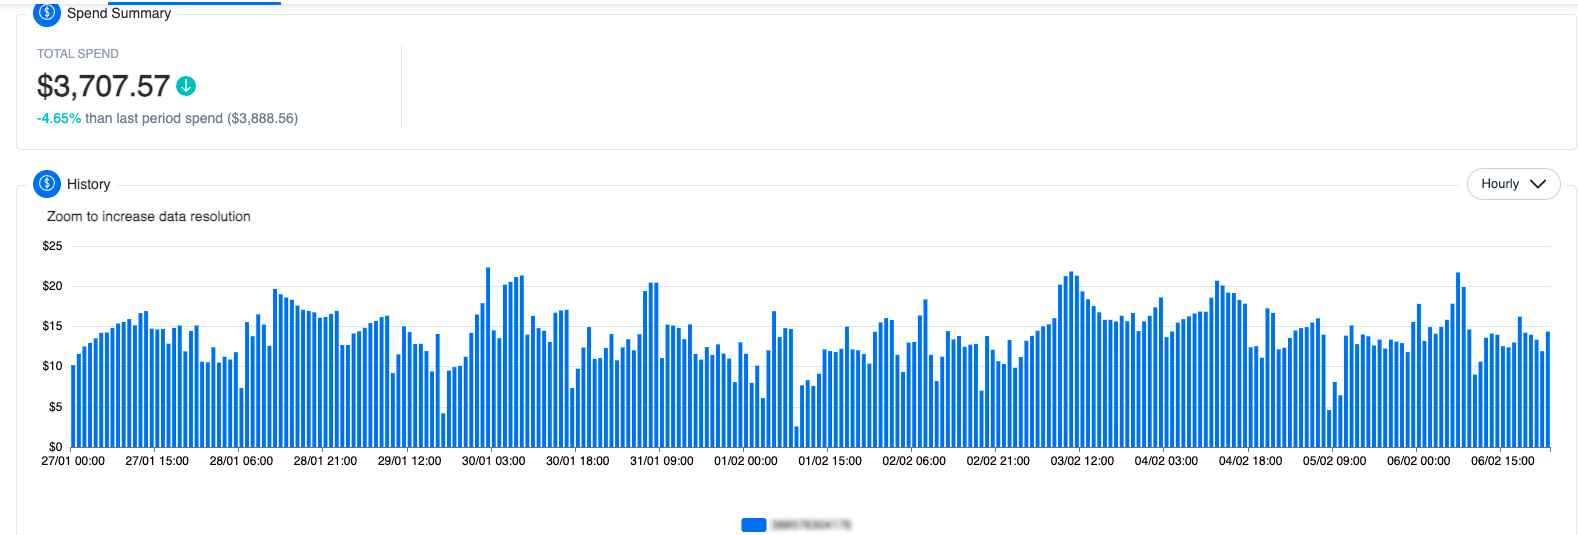
nOps dashboard showing your hourly unblended, blended, or amortized cloud costs
Hourly granularity is available for a charge through AWS cost explorer, or through third-party FinOps tools.
Implement a tagging strategy.
Tags are essential to ensure that you can view meaningful information on AWS (or other cloud providers) billing. Without tags, you see only the cost for AWS services, resources, operation type, or usage type on your AWS bill. Depending on your role, these dimensions may or may not mean anything to you. However, by using tags, you get visibility to meaningful billing information to better organize your cloud costs, such as cloud costs for different stacks, different customers, different cloud environments, different projects, departments, or teams. For more information and best practices, you can check out our full guide on AWS Cloud Cost Allocation.
AWS Cloud Cost Allocation: The Complete Guide
Ensure you're using alerts and notifications.
Nothing is worse than a surprise bill. If your data transfer costs suddenly spike and threaten to bust your entire monthly AWS budget, knowing ASAP is your best safety net. That’s why it’s important to set thresholds for cloud spending alters and notifications for cost overruns or unusual spending patterns.
Step Two: Understand AWS Pricing & Commitments
On-Demand
Reserved Instances (RI)
Savings Plans (SP)
Spot instances
Choosing commitments wisely is key to managing cloud costs
The low hanging fruit is to move some of your steady usage onto cheaper Reserved Instance or Savings Plan commitments. For additional savings and flexibility, there are commitment management solutions which optimize your commitment purchases for you with a buyback guarantee.
Step Three: Rightsize EC2 Regularly
At a basic level, cloud cost optimization is about using less, and paying less for what you use. Rightsizing cloud resources helps you to align your infrastructure better with actual usage, so that you don’t pay for cloud resources you aren’t using.
It’s important to note that rightsizing is necessarily a continual process. Even if you rightsize workloads initially, performance and capacity requirements for workload change over time.
How does rightsizing EC2 in cloud computing work?
EC2 instances are virtual servers in Amazon’s Elastic Compute Cloud (EC2) that you can use to run applications on the AWS infrastructure.
The basics of rightsizing include using monitoring tools to collect key resource-level metrics on your usage. In accordance with AWS guidelines, you compare the current usage of each metric against two baselines: one for your current instance type and another for the next smaller instance type. If your maximum usage is less than 40% of the current type, or up to 80% of the smaller instance’s baseline (i.e., you’re using 20% less than what the smaller instance typically supports), it’s safe to consider downsizing to that smaller instance type. For more information, you can read this complete guide to rightsizing EC2 instances that covers the full process with steps, screenshots, and rightsizing formulas.
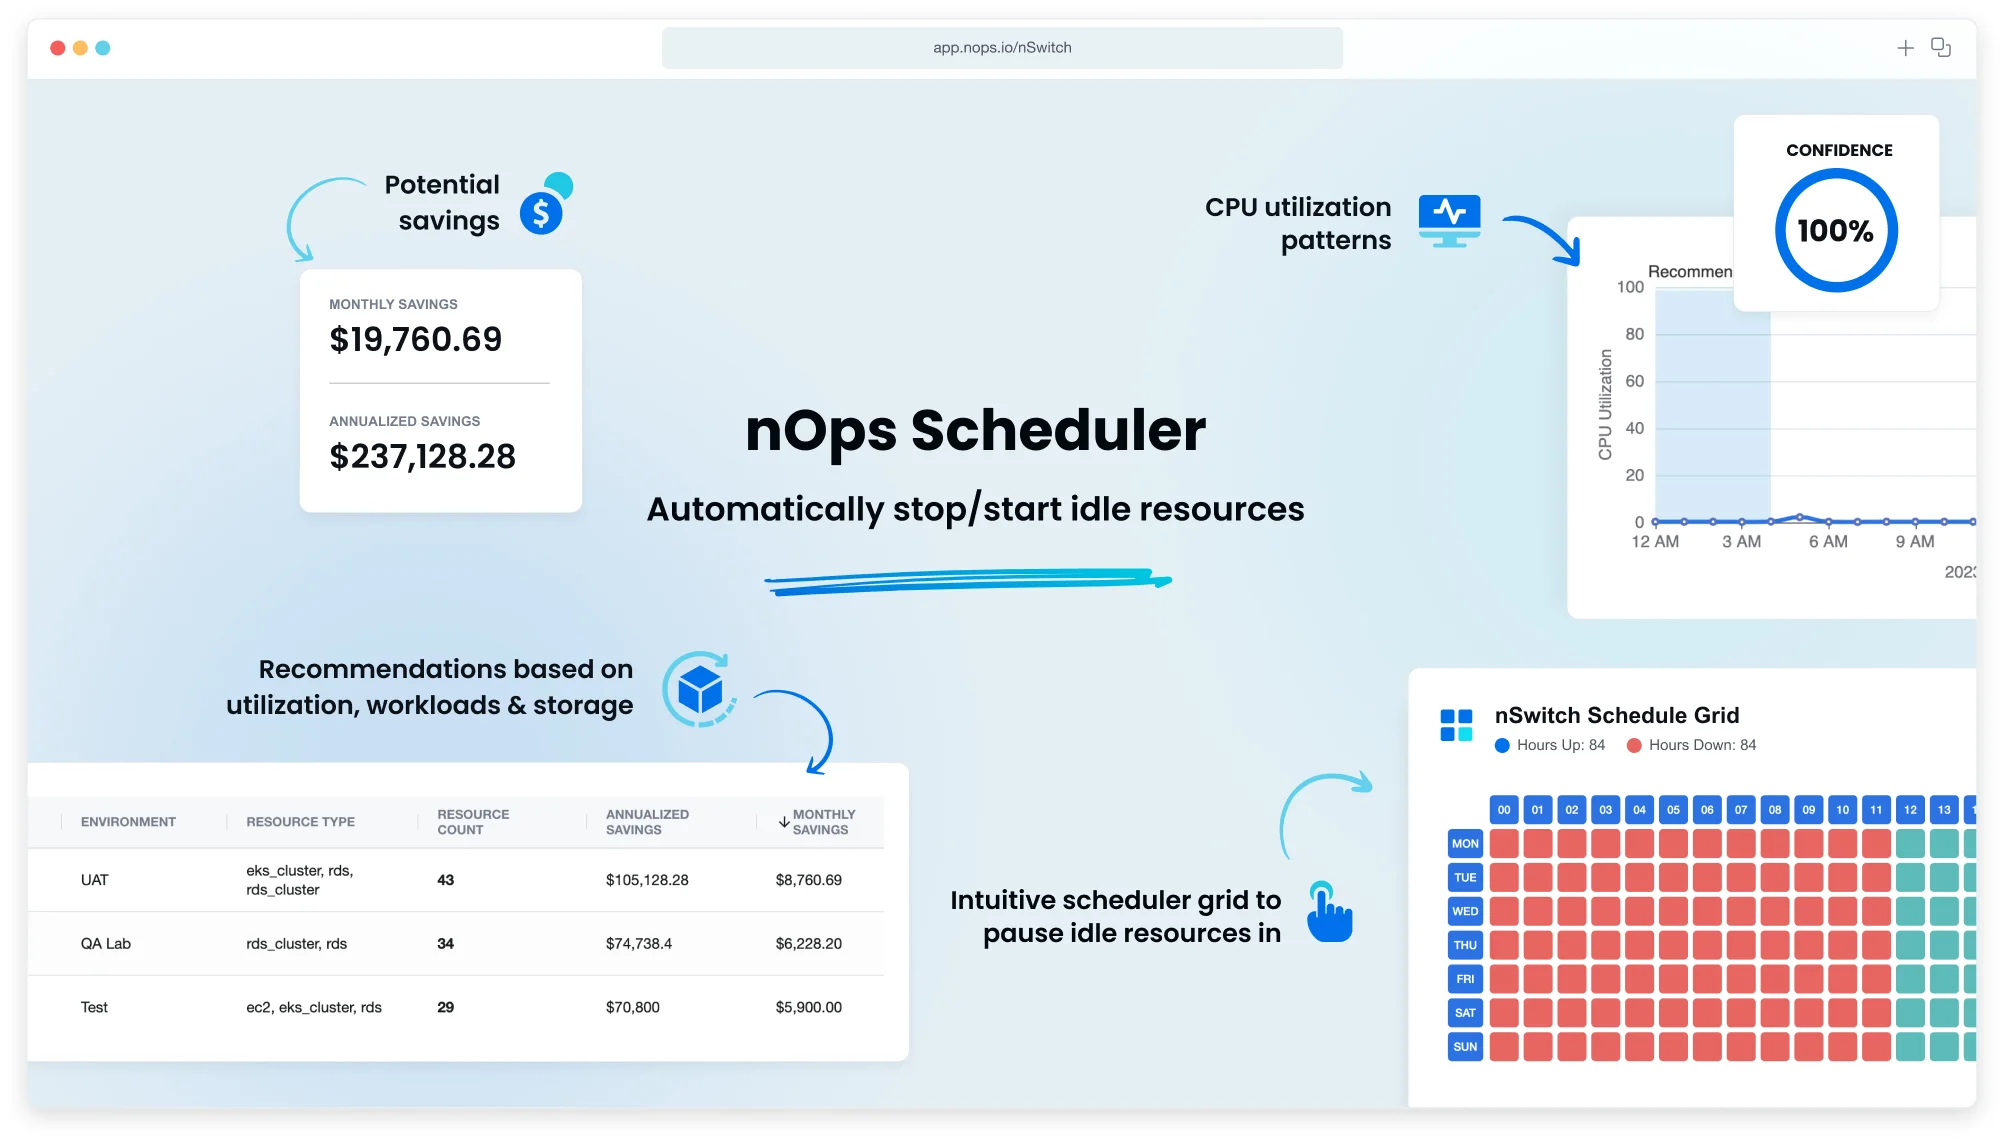
Step Four: Schedule Resources for QA and Dev environments
Unless your team needs to use Dev and Test environments twenty-four hours a day, seven days a week, chances are that you can leverage scheduling to save on your AWS bill. And if you stop these environments outside of the core 8-10 hours your team works, you can potentially save 60-66% of these cloud costs.
While this process can be done in the AWS Console or in the CLI, we recommend using automation tools. nOps Scheduler makes it easy to schedule your resources with just a few clicks.
Step Five: Delete unused or underutilized resources
If you’re not using cloud resource, deleting them can help you realize significant cost savings.
Idle EC2 instances
AWS accounts often accumulate unused EC2 instances over time. These instances, often remnants of workload migrations, auto-scaling misconfigurations, developmental tests, or orphaned resources from discontinued projects, drive up unnecessary and wasteful cloud costs.
Stopping idle instances is one of the most effective cost optimization strategies. For every dollar spent on an instance, you save two dollars in corollary charges such as storage, network and database charges.
Unused EBS Volumes
EBS volumes are a type of storage option provided by AWS that allows you to create storage volumes and attach them to Amazon EC2 instances. They act much like traditional hard drives, providing persistent block-level storage, which means that the data on the volume is saved across reboots of the EC2 instance.
In environments where EC2 instances are frequently launched and terminated, EBS volumes often outlive their associated EC2 instances, leading to an accumulation of idle volumes and unnecessary cloud costs.
By default, unless you select the “Delete on Termination” option during instance launch, terminating the EC2 instance will only detach the EBS volume, not delete it. As a result, idle EBS volumes that haven’t been used in weeks or months accumulate, driving up unnecessary costs.
Step Six: Migrate EBS volumes from GP2 to GP3
In addition to deleting unused EBS volumes, migrating to more cost-effective options is another important cost optimization strategy.
GP2 and GP3 are general-purpose AWS EBS volumes, with GP2 being the older generation and GP3 the newer. GP2 volumes offer a base performance that scales with volume size, maxing out at 16,000 IOPS. GP3 volumes start with a higher base performance that doesn’t depend on size, and allow for separate scaling of IOPS and throughput, up to 16,000 IOPS and 1,000 MiB/s.
This means GP3 offers more flexibility and cost-efficiency for various workloads, allowing users to independently increase IOPS and throughput without needing to provision additional block storage. GP3 volumes generally cost up to 20% less compared to GP2 volumes with the same storage size.
Step Seven: Conduct a Well-Architected Review of your cloud usage
The AWS Well-Architected Review is a framework for building and running applications and workloads that are secure, high-performing, reliable, scalable, and cost-efficient. It helps you understand:
- How does my AWS environment stack up to industry best practices?
- How can I optimize the performance and cost of my architecture?
Well Architected Reviews provide a series of questions to answer in order to assess your workload for compliance with the five pillars of the AWS Well-Architected Framework: Operational Excellence, Security, Reliability, Performance Efficiency, and Cost Optimization. By answering these questions, you’ll see how well your architecture aligns with cloud best practices and the actions you need to take to get more ROI out of your cloud investments.
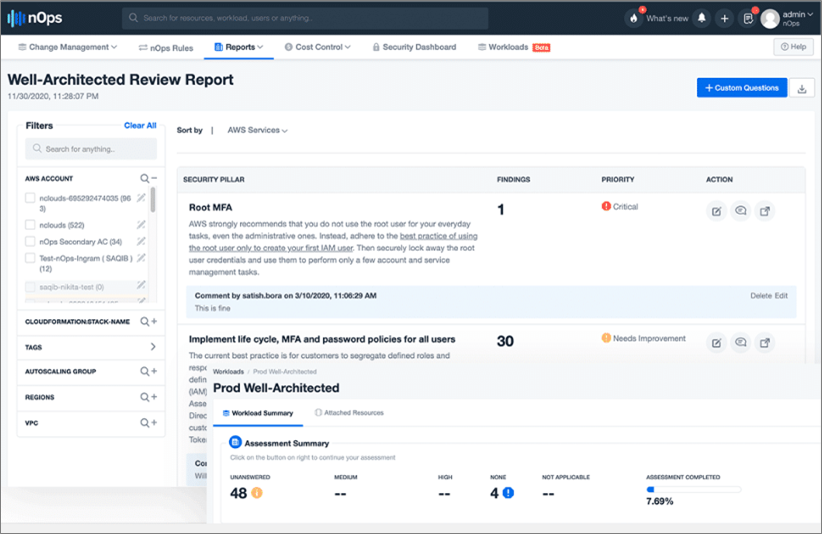
nOps automatically scans your workloads to help streamline and automate the WAR
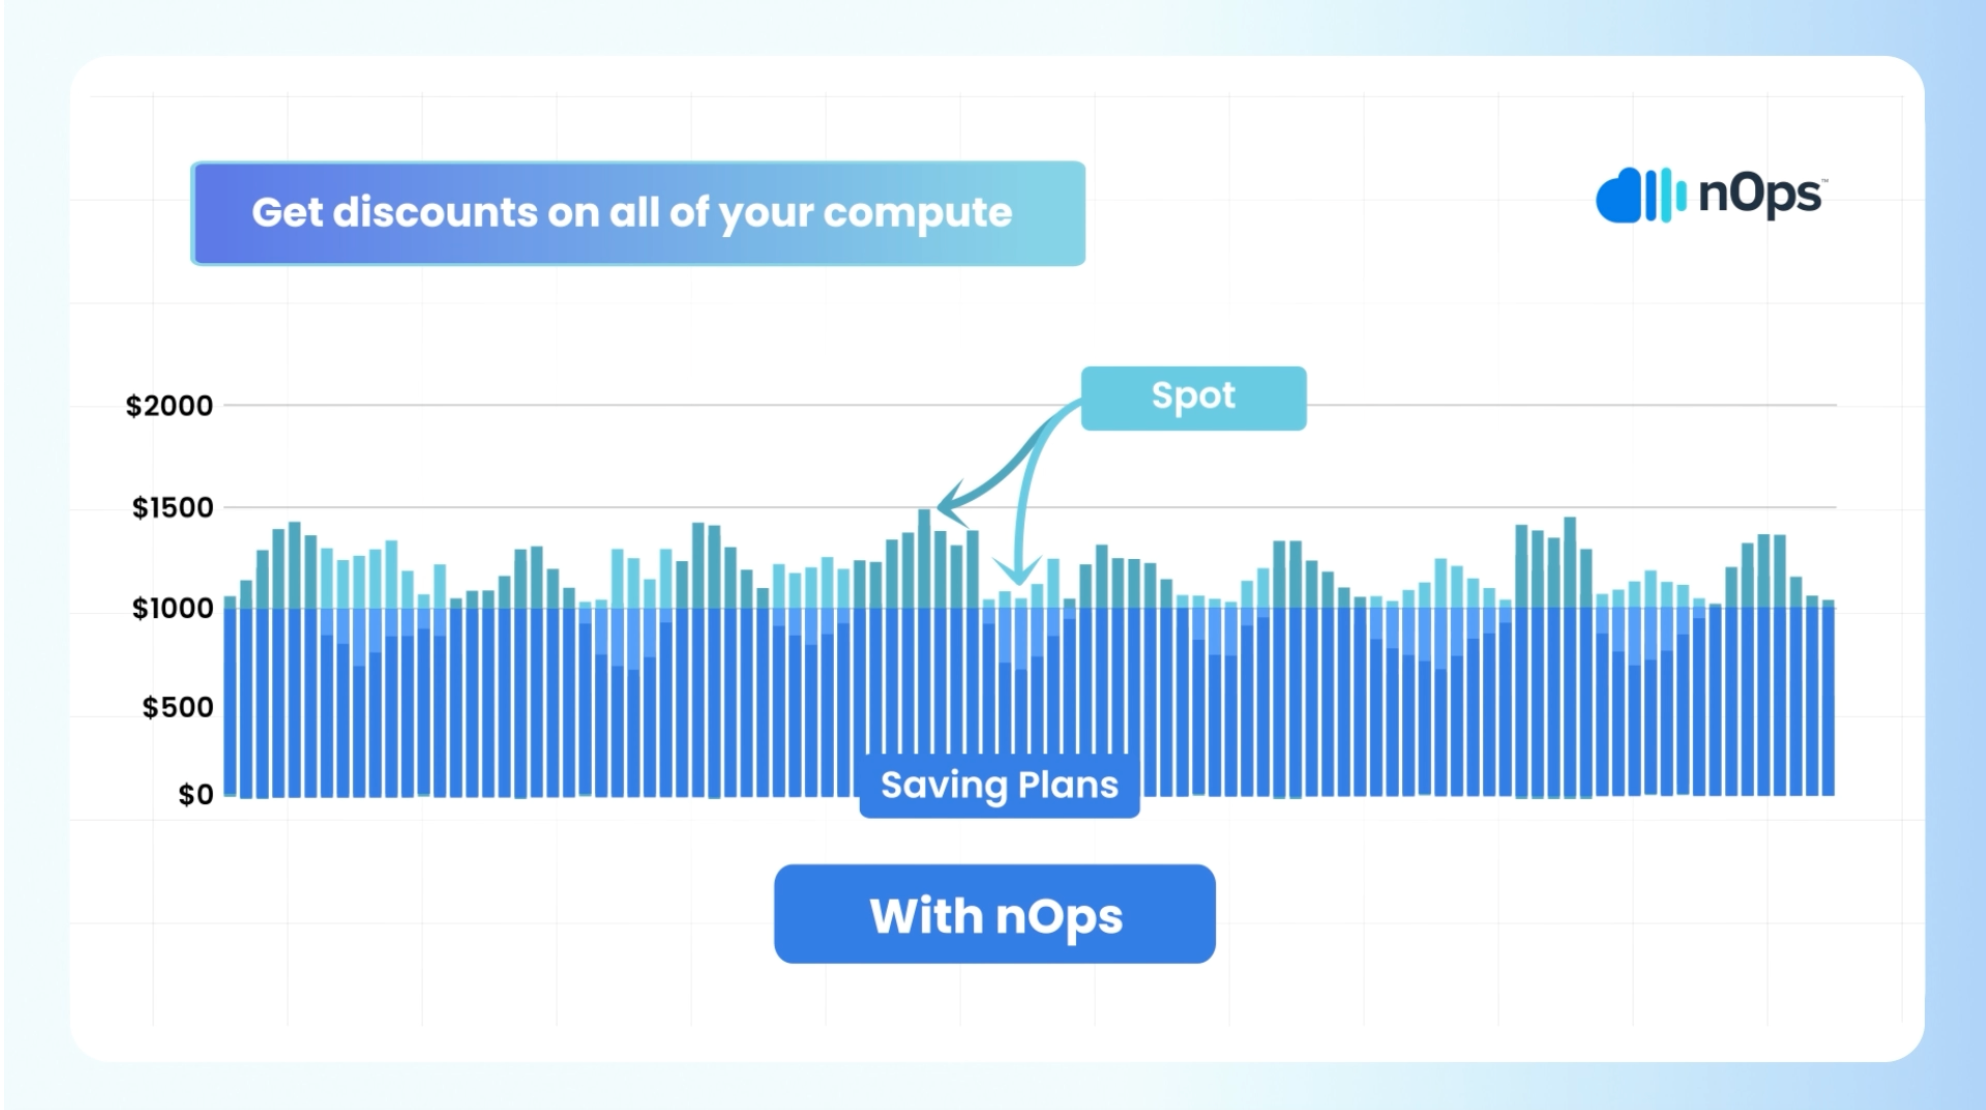
Step Eight: Save with Spot instances
AWS Spot Instances are spare AWS capacity that users can purchase at a heavy discount from On-Demand (up to 90% on instances). However, the catch is that AWS does not guarantee that you’ll be able to use a Spot instance to the end of your compute needs. When a user willing to pay the full On-Demand price emerges, AWS can terminate these instances with a two-minute warning (known as a Spot Instance Interruption).
These terminations need to be handled gracefully to avoid downtime, making Spot usage an advanced-level technique (unless you have a tool to help). However, the attractive discounts offered by Spot instances makes using them one of the most important FinOps best practices
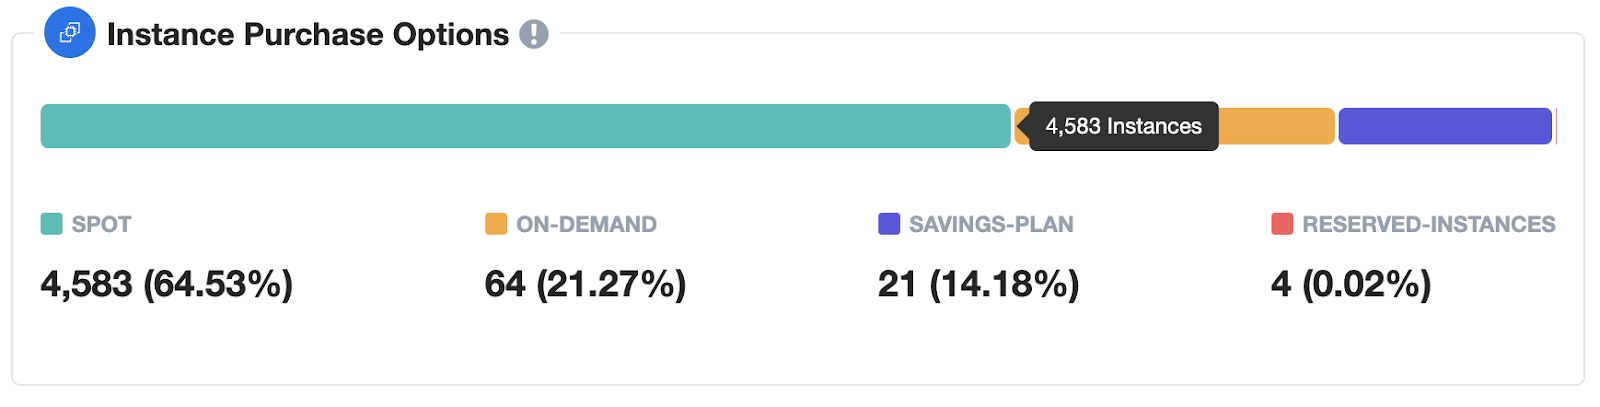
Step Nine: Understand how optimized your cloud costs are
One quick way to gauge how well your cost optimization efforts are going is to see how much of your cloud usage is discounted. Your goal should be to have your full-price On-Demand spend as close to 0% as possible.
To make it easy for you to understand and optimize your cloud costs, nOps created an all-in-one automated cloud cost optimization platform. At nOps, our mission is to make it easy and painless for engineers to take action on cloud cost optimization. Here are a few reasons why you should do FinOps on nOps:
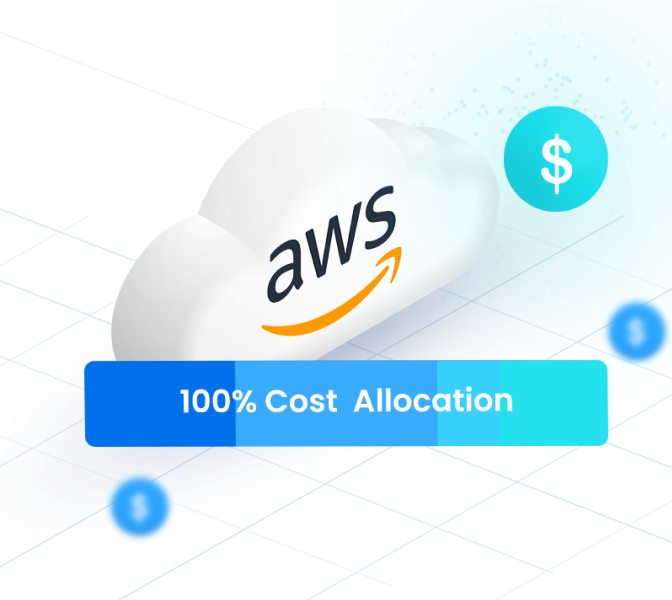
Business Contexts: understand 100% of your AWS bill with cost allocation, chargebacks, showbacks, tagging, and intuitive filters for breaking down cloud costs
- Compute Copilot: makes it easy to save with Spot discounts to reduce your On-Demand costs by up to 90%
- Commitment management: automatic life-cycle management of your EC2/RDS/EKS commitments with risk-free guarantee
- Storage migration: One-Click EBS volume migration
- Rightsizing: rightsize EC2 instances and Auto Scaling Groups
- Resource scheduling: automatically schedule and pause idle resources
- Well Architected Review: automate and streamline your AWS Well-Architected Review
About nOps, the AWS cost optimization platform
nOps was recently ranked #1 in G2’s cloud cost management category, and we optimize $1.5 billion in cloud spend for our customers. Join our customers using nOps to understand your cloud costs and leverage automation with complete confidence by booking a demo today!