Skip to content

- Blog
- Uncategorized
- Cloud Cost Framework: 11-Step Cloud Cost Strategy Guide
Cloud Cost Framework: 11-Step Cloud Cost Strategy Guide
Cloud spending will grow 20.4% to $678.8 billion in 2024, according to Gartner. That’s why it’s no surprise that cutting cloud waste and optimizing ROI is a top priority for tech organizations this year.
If you take a look at the FinOps Foundation, you’ll see that three major phases of the FinOps lifecycle make up the cloud cost framework: Inform, optimize, and operate. The objective here is to continuously develop and refine strategies and workflows, measure outcomes, and implement incremental improvements.
As organizations progress through each phase, it is recommended to adopt a “crawl, walk, run” approach. This model encourages teams to take quick action and gradually expand the size and scope of their actions as they gain experience and build momentum.
In this guide, we’ll break down these phases into actionable steps and best practices you can take to start implementing an effective cloud cost optimization strategy.
Phase One: Inform
It all starts with gaining consistent visibility into your cloud environment and showing teams and departments how much they spend on their cloud usage. Without clear insights, it’s hard to identify what and how much to cut (let alone achieve accurate cost forecasting). Key challenges typically include:
- What do the thousands of lines of my Cost and Usage Report (CUR) mean? How much did my product/service/application actually cost?
- Who is driving cloud costs? How do I know who is responsible for shared costs?
- Why did my AWS bill unexpectedly go up or down and what is it going to be next month?
Let’s dive into some practical tips for understanding, allocating, monitoring, analyzing and reporting on your cloud costs.
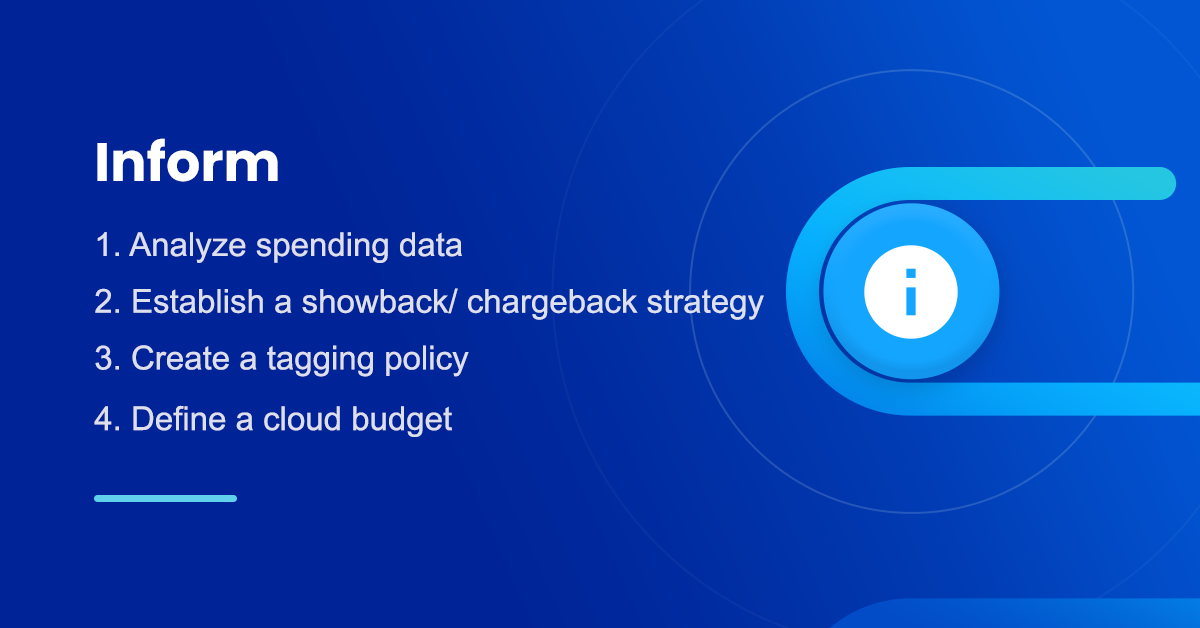
1- Analyze spending data
Start by looking at the past spending data for every business unit, department, application, and resource. You can only create an accurate cloud cost framework when you understand your existing cloud spend.
The AWS Cost and Usage Report (CUR) records every billable resource in your cloud environment. This includes every single EC2 instance, S3 storage cost, Reserved Instance, Savings Plan, data transfer fee, and more. If you’ve ever had to export a multi-gigabyte spreadsheet file to understand your AWS usage and costs, you know how hard it can be to understand your cloud spending.
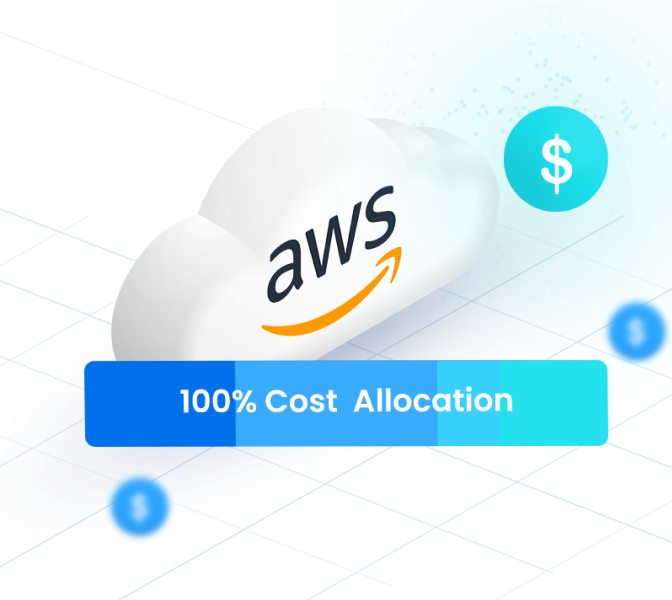
A tool like Business Contexts can help make it easy to understand and analyze the CUR, transforming millions of rows of contextless data from your cloud provider into the who, what, when and why of cloud spend.

2- Create a tagging policy
Implementing a tagging system is essential to ensure that you can view meaningful information on AWS billing (or that of other cloud providers). Without tags, you see only the cost for AWS services, resources, operation type, or usage type on your AWS bill.
By using tags, you get visibility into meaningful billing information to better organize your cloud costs, such as cloud costs for different stacks, different customers, different cloud environments, different projects, departments, or teams.
For more information and best practices, you can check out our full guide on AWS Cloud Cost Allocation.
AWS Cloud Cost Allocation: The Complete Guide
3- Establish a showback/ chargeback strategy
Implementing a showback or chargeback strategy can help you establish cloud spend accountability and ownership across different business units.
Showback is an approach where users are shown (but not billed for) the costs associated with their cloud resource consumption. It’s quick and administratively simple to implement, often serving as a precursor to a full chargeback system.
Showback improves accountability by highlighting the services consumed, allowing users to understand and potentially challenge their cloud computing usage before any actual billing takes place. It focuses on the outputs of IT services rather than the inputs like infrastructure or labor.
On the other hand, chargeback is a financial approach where users or departments are actually billed for their cloud resources, turning IT into a cost center. This method requires more robust financial processes and often leads to a more cost-conscious culture within an organization as departments are directly accountable for cloud cost management.
Implementing a chargeback system is more complex and takes longer to put into use. You would have to create a budget for every business unit based on their past usage and integrate chargeback reports with internal financial management tools.
4- Define a cloud budget, monitoring and alerts
Your cloud budget will be the main metric when you implement your cloud cost framework. Engineering, product and management teams can set budgets based on historical cloud spending data and the unit costs revealed by your tagging and cost allocation scheme.
Once you define a cloud costs budget, it’s advisable to set up monitoring and alerts to avoid a surprise bill. If your data transfer costs suddenly spike and threaten to bust your entire monthly cloud computing budget budget, knowing ASAP is your best safety net. That’s why it’s important to set thresholds for cloud spending alters and notifications for cost overruns or unusual spending patterns.
Typically, setting budgets involves some trial and error. By involving all stakeholders and regularly iterating on cloud cost estimates, you’ll arrive at a good understanding of what it should cost to build, deploy, and maintain products and features.
Phase 2: Optimize
The optimize phase involves identifying cost optimization and cost avoidance measures. You track all the cloud usage and processes in real-time to optimize cloud usage.
Here are the steps involved in the optimize phase:
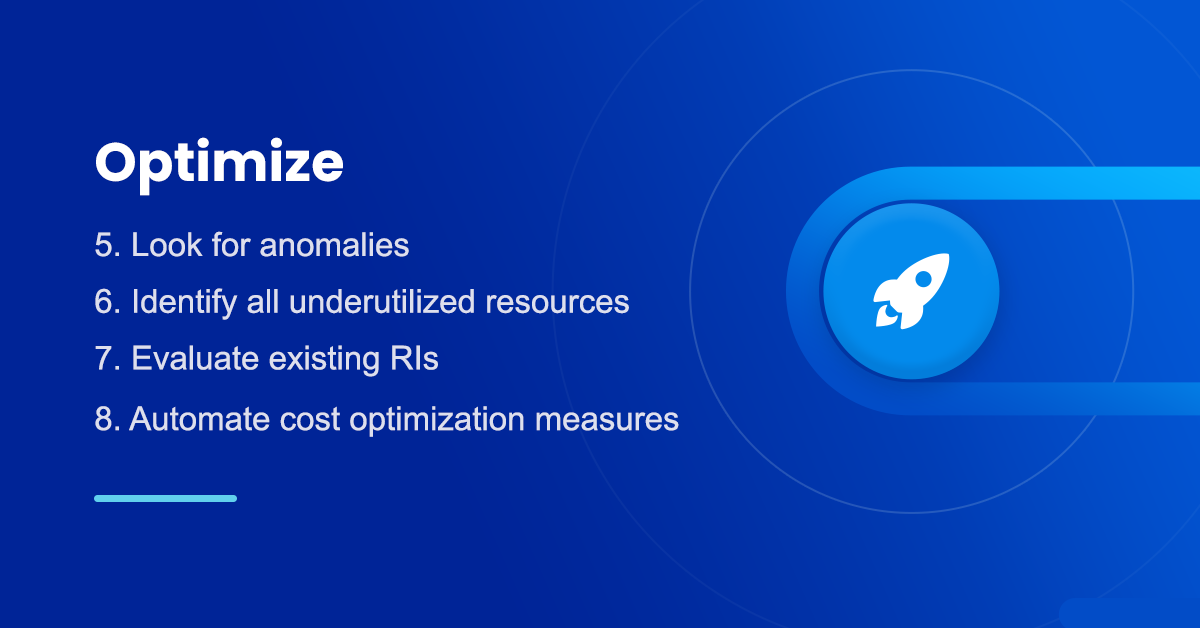
5- Look for anomalies
Detecting anomalies is about identifying unusual spikes in your overall cloud usage. By finding any big deviations like a sudden rise in cloud spend for a particular day of the week or a particular application, you can work to quickly remedy it before it can cause any long-term problems.
It’s important to note that hourly granularity is key when it comes to identifying anomalies in your usage of cloud resources. With hourly granularity, you’re able to see patterns and spikes in usage, allowing you to trace back the causes of unexpected costs. A cloud cost visibility platform can help you drill down into your hourly cloud spending by service, resource, and other essential criteria.
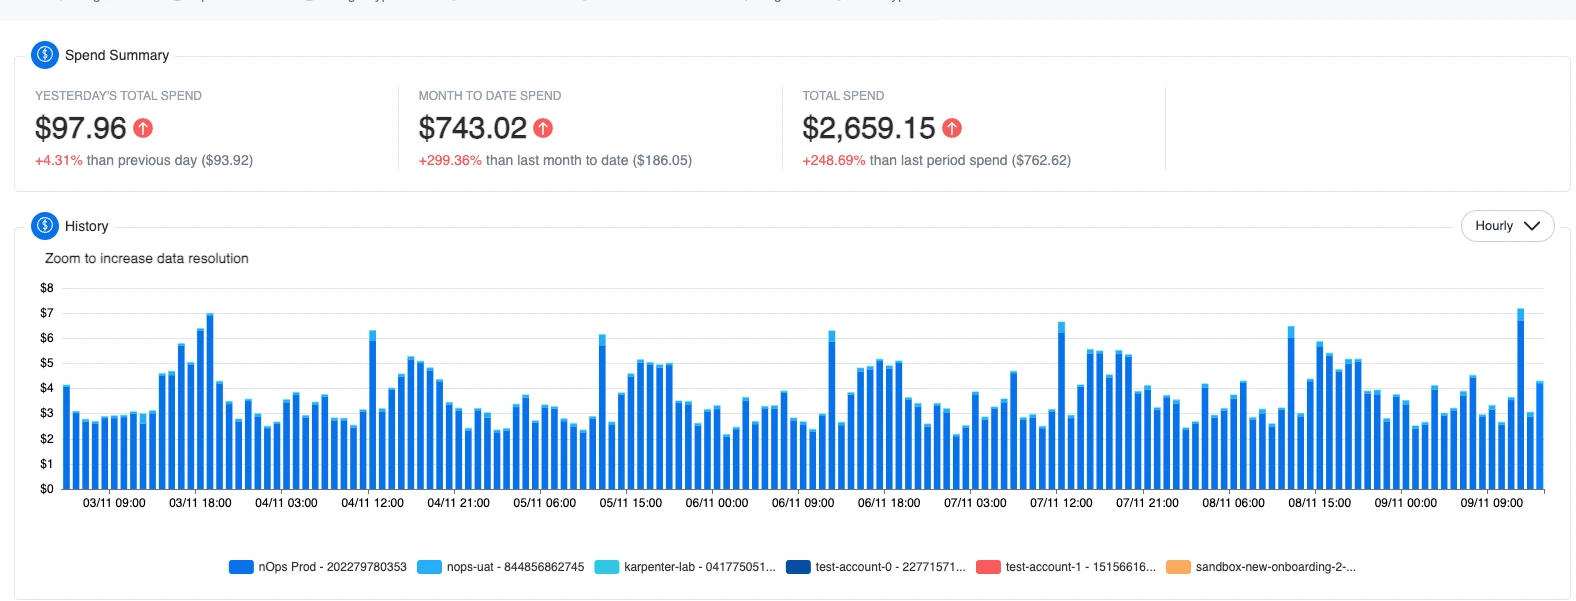
With hourly visibility, the spikes in traffic are clear — making it easy to identify the culprit. A particular process or job is triggering at these specific times to drive unnecessary costs (in this example, by misrouting internal traffic through an external interface).
Hourly granularity is available for a charge through AWS cost explorer, or through third-party FinOps or multi cloud cost management tools.
6- Identify all underutilized resources
While the cloud’s ability to quickly provision resources for experimentation is a key benefit, it can lead to over-provisioning — especially when it comes to EC2 resources. It’s easy to end up with excess capacity and underutilized resources. But AWS continues to charge you for the capacity whether you end up using it or not.
Many organizations are currently overspending, with EC2 (followed by RDS and S3) likely the most expensive item on your AWS bill. Once you’ve identified idle or underutilized resources, you can use techniques like terminating idle instances, deleting orphaned storage volumes, and rightsizing resources to realize significant cloud cost savings.
7- Evaluate existing Reserved Instances
Reserved Instances (RI) and Savings Plans (SP) are pricing models offering lower prices than On-Demand pricing in exchange for a specific usage commitment (measured in $/hour) for a one- or three-year period.
By committing to these cloud cost models, cloud customers can save up to 60-70% on your cloud resources. However, forecasting commitments can be quite difficult to do accurately.
In the dynamic world of cloud infrastructure, systems are constantly evolving, the tools you want to use change, and flexibility is key. If you commit too heavily, every hour you’re paying for unused capacity. But if you under-commit, you’ll have to pay the On-Demand premium for additional resources.
Here are some principles you need to keep in mind when determining how to optimize your Savings Plan and Reserved Instance usage.
1. Isolate the services to be covered by Savings Plans or Reserved Instances
A common pitfall is not understand which resources will or won’t be covered by your purchase commitments.
Savings Plans don’t cover everything — they cover EC2 Compute, Fargate, and Lambda. They do not cover non-compute elements such as EBS volumes or data transfer. Many companies look at total EC2 spend when determining the commit level, leading to a lot of unused commitment over the term length.
2. Analyze your On-Demand spend on an hourly basis
Savings Plans and Reserved Instances apply on an hourly basis, meaning that you’ll need to get fairly granular in your breakdown.
They operate on a “use it or lose it” basis, meaning that if you commit to $10 per hour but only consume $6 of services in any hour, you will lose the remaining $4. That’s why it is critical to monitor usage of commitments continually.
3. Recognize that Savings Plans don’t normally cover spikes.
8- Automate cost optimization measures
After all, optimization can take up a big chunk of your team’s time — time that could be used for building and innovation. That is why an important step of the cloud cost framework is automating cost optimization measures.
nOps is a fully automated AWS cloud management platform that can help reduce your AWS costs by over 50% on auto-pilot.
Here are some of the many ways nOps can help automatically optimize costs:
- Automate tagging process and handle both untagged and mistagged resources to ensure every single dollar of AWS spend is correctly allocated

- Pause idle resources automatically by detecting their usage pattern.

- Automatically manage your Reserved Instance and Savings Plan commitments and back them with a risk-free guarantee
- Rightsize by automatically detecting improperly sized EC2 instances and recommending the correct size to reconfigure them

You can book a demo to learn more about how nOps can help you save on cloud costs.
Phase 3: Operate
The operate phase involves putting your optimization steps into action. While your cloud cost goals have already been set, this is the phase where decisions and plans are put into place so that you can meet your cloud financial management goals.
Here are the steps that make up the operate phase:

9- Establish a culture of cloud cost optimization
| Build a FinOps team | ● Ensure the FinOps team is positioned well in the organization, organized appropriately, staffed correctly, and provided with necessary funding ● Ensure that the working plan accounts for the growth of FinOps at the organization using the established maturity process ● Define and evolving FinOps team skills |
| Manage the FinOps practice | ● Create an implementation plan for the organization’s FinOps strategy ● Mature the practice over time ● Manage FinOps work ● Integrate data and processes with the organization |
| Collaborate and make decisions | ● Introduce FinOps to all portions of an organization based on the organization’s goals and needs ● Foster stakeholder relationships ● Manage decision-making models |
| Drive stakeholder adoption | ● Stage 1: Plan for FinOps ● Stage 2: SocializeFinOps ● Stage 3: Prepare the organization ● Drive cultural adoption |
10- Rightsize purchase commitments and resources
In the optimize phase, you likely realized that you’re paying for more RIs and underutilized resources than you need to. At this point, you should review the excess capacity to rightsize these resources and make changes accordingly.
In dynamic cloud environments, idle EC2 instances and orphaned EBS volumes are a common oversight that commonly results in substantial cloud waste. As a result, idle resources that haven’t been used in weeks or months frequently accumulate, draining resources and inflating operational costs.
Rightsizing is one of the most effective ways to control cloud costs. It involves analyzing instance performance, usage needs, and patterns to establish a usage baseline — then turning off idle instances and re-sizing instances that are overprovisioned or poorly matched to the workload.
11- Continuously improve and optimize cloud costs
Even if you rightsize workloads initially, performance and capacity requirements for workload change over time.
If you are not constantly rightsizing workloads, you are operating AWS like a traditional data center — it not only leads to unnecessary costs but also hinders optimal performance.
If you’re looking to continuously optimize your cloud cost savings, automation is key for saving on time and cost. Cloud cost management tools can help you understand and optimize the cost of your cloud services — and keep them optimized.
How nOps Can Help Your Cloud Cost Management Strategy
To make it easy for you to understand and optimize your cloud costs, nOps created an all-in-one automated cloud cost optimization platform. At nOps, our mission is to make it easy and painless for engineers to take action on cloud cost optimization. Here are a few reasons why you should do FinOps on nOps:
Business Contexts: understand 100% of your AWS bill with cost allocation, chargebacks, showbacks, tagging, and intuitive filters for breaking down cloud costs

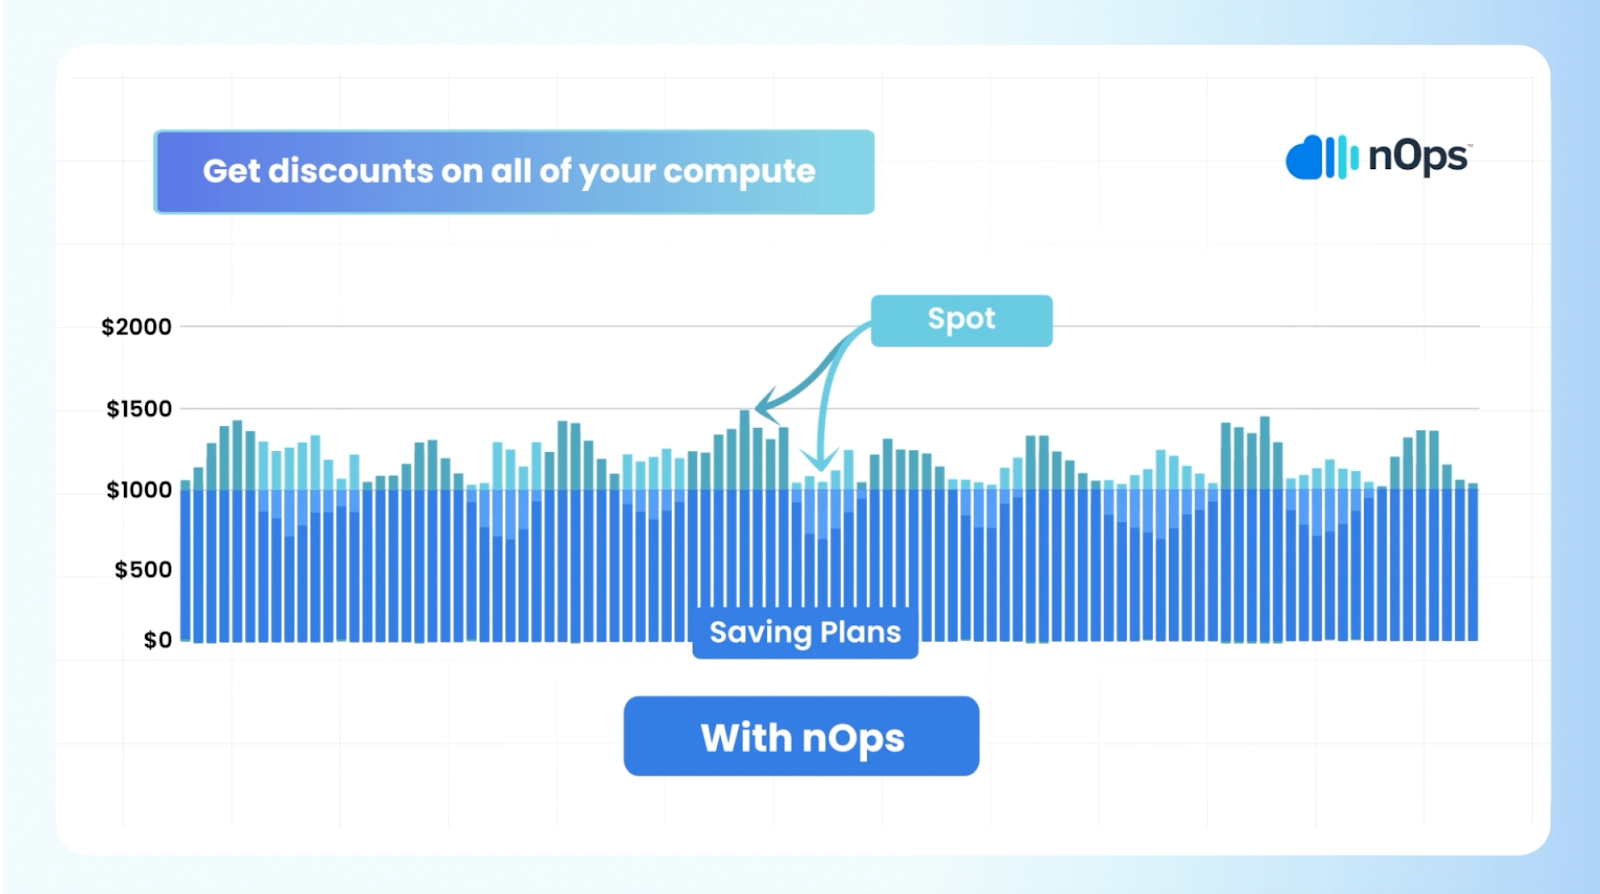
- Compute Copilot: makes it easy to save with Spot discounts to reduce your On-Demand costs by up to 90%
- Commitment management: automatic life-cycle management of your EC2/RDS/EKS commitments with risk-free guarantee
- Storage migration: One-Click EBS volume migration
- Rightsizing: rightsize EC2 instances and Auto Scaling Groups
- Resource scheduling: automatically schedule and pause idle resources
- Well Architected Review: automate and streamline your AWS Well-Architected Review
About nOps, the AWS cost optimization platform
nOps was recently ranked #1 in G2’s cloud cost management category, and we optimize $1.5 billion in cloud spend for our customers. Join our customers using nOps to understand your cloud costs and leverage automation with complete confidence by booking a demo today!